
In Part 1 of this series, I talked a bit about the qualitative differences between soft and harsh lighting. Now I’m going to give you five quick ways you can use those different qualities of light in your own photography. These tips will get you started, but I strongly encourage experimentation!
 1. The Magic Hour
Many photography and video professionals will throw out the term “Magic Hour” when referring to the quality of sunlight just after dawn and just before dusk. These special times of day vary in length and quality depending on the time of year, but look for opportunities to use these times of the day, usually before 9am and after 4pm, give or take an hour or two. Other times of the day can be manageable, but if the sun is too far overhead, you will find that the shadows on your subject are unflattering and harsh, and it will be difficult to get good images without a lot of help from a lot of artificial light modification. The image above was taken about 45 minutes before sunset-notice that while the contrast is high, the transition from highlight to shadow is smooth and the direction of the sunlight is at a pleasing angle.
2. The Big Secret Piece of Equipment
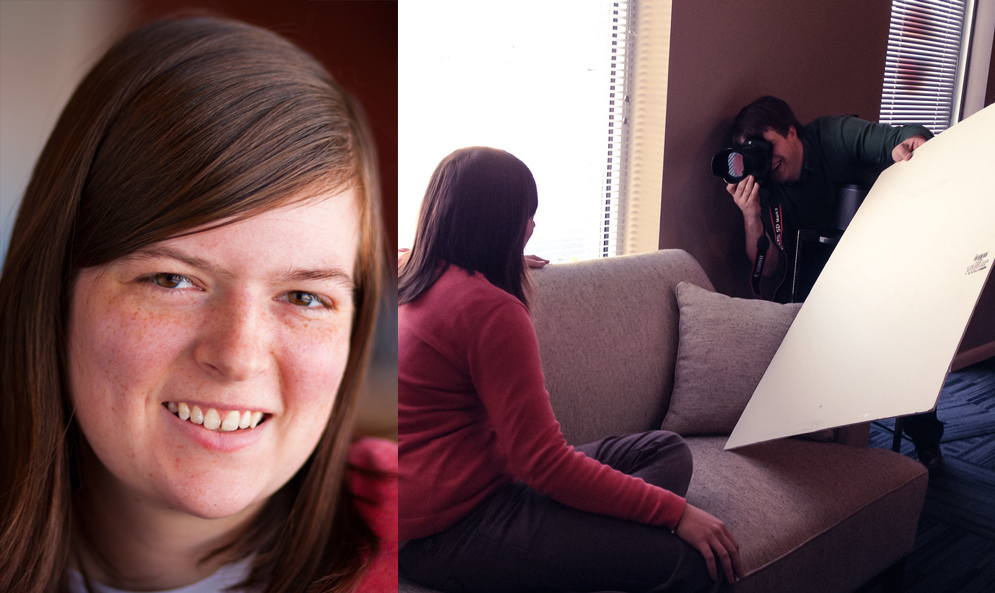
One of the best tools of the trade is super easy and cheap: foam-core or poster-board. On a sunny afternoon, a big piece of white foam-core used as a reflector can become a source of light that will wrap your subject in a pleasing glow, creating an soft transition from highlight to shadow. Put the source of light behind your subject, and then use the foam-core to reflect the light onto your subjects face. Alternatively, you can use foam-core to fill in shadows that are too dark (see how in the photo below).
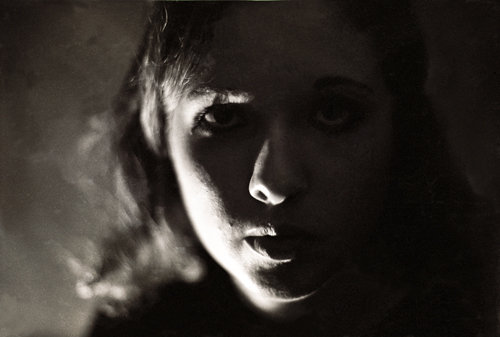
3. The Window
When you’re stuck inside, try shooting next to the biggest window that you can find. The trick is to find a window without the sun shining directly through it. The right window will act as a big, even source of light, which will give that soft light look that is so great for portraits. (Thanks again to our great intern Stephanie for sitting for this portrait and the photos from Part 1!)
4. Home Brew Light
Another quick trick is to use floor or table lamps that have large translucent shades. If you look at the shade on a lamp, often they can behave as a single light source and create a soft, even light. I recommend floor or table lamps because a ceiling light source is often at an angle that is too high, creating harsh, high-contrast shadows on your subject, most noticeably underneath eyebrows.
5. Home Brew Drama Light
If you remove the shade from your lamp you were using for number 4, a bare light bulb can act as a small pin of light that can create a moody or dramatic feel. When playing around with this look, try putting the light directly at the side of your subject, or even slightly behind, to accentuate the shadow drama. This will probably work best in a dark room where your bare bulb is the only light source. You may have to play around to get the feel you want, but this can often have great results!
The key to all of this is to practice. All of these tricks take experimentation to get good results. Do a photo session, then later look at your photos and figure what you like and why. Then go practice some more! Making great images takes years of practice and taking risks with new ideas, so go have some fun with your camera!